

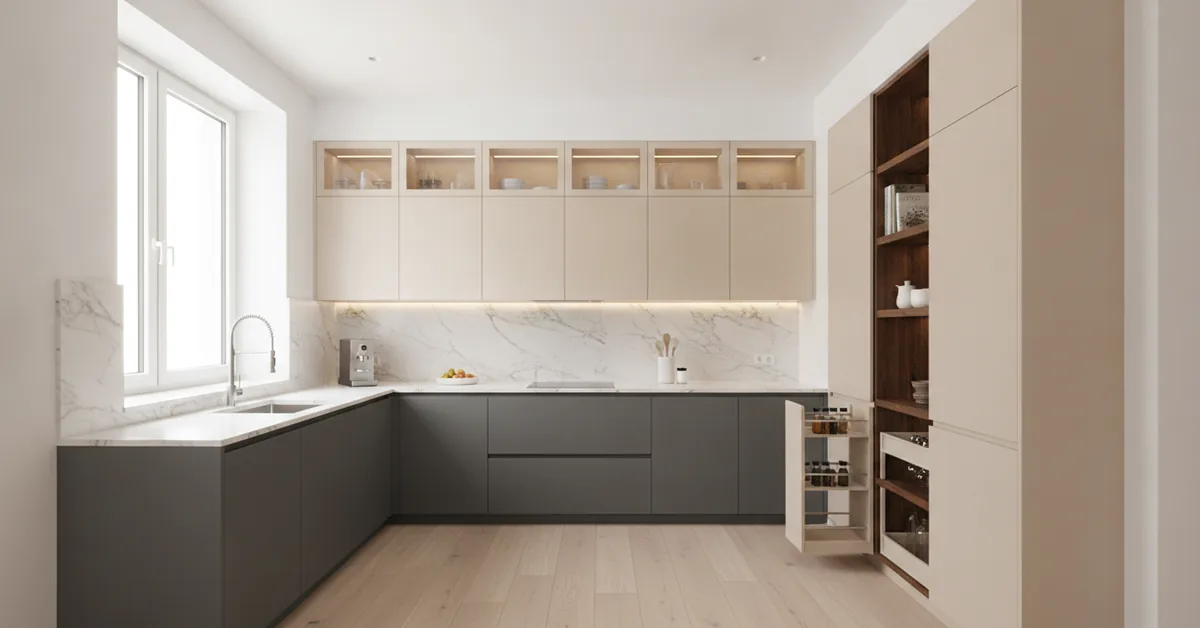
I see it all the time when I first walk into a client's home: a compact kitchen with standard 30-inch upper cabinets and a foot of dusty, unused space above them. It’s the most common missed opportunity in kitchen design. That dead zone isn't just wasted space; it’s a daily reminder of a kitchen that isn't working as hard as it could. People often think the solution is just to build taller boxes, but the real art lies in how you design that vertical real estate to be both beautiful and ruthlessly functional, especially when every inch counts.
The Blueprint for a Taller, Smarter Kitchen
Go Full Height, But Plan the Access: Extending cabinets to the ceiling is the first step, but without a strategy for
- Go Full Height, But Plan the Access: Extending cabinets to the ceiling is the first step, but without a strategy for accessing the top shelves, they become a graveyard for forgotten appliances.
- Integrate Your Appliances Vertically: Stacking ovens or integrating a microwave into a tall cabinet pantry frees up critical counter space and creates a streamlined, modern look.
- Think in Layers, Not Just Shelves: Custom vertical dividers, pull-down mechanisms, and interior drawers turn a simple tall cabinet into a highly organized storage powerhouse.
- Material Choice is Structural: The stability of tall cabinet doors, especially in humid environments, depends heavily on choosing the right material—often, engineered wood like HDF outperforms solid wood here.
1. The Ceiling-Height Upper Cabinet: More Than Just a Taller Box
Taking cabinets to the ceiling is the most obvious move, but the execution is what separates a custom job from a big-box solution. We’re not just adding another shelf. We're rethinking the entire upper storage zone. A common client request is for glass-front display cabinets at the very top. While beautiful, I always ask: “What are you going to display up there, and how often will you clean it?” More often than not, a solid door for long-term storage (think seasonal platters or the turkey roaster) is far more practical. For a 9-foot ceiling, we typically build a 42-inch or even a 48-inch upper cabinet. The key is to make the top 12-15 inches a separate internal compartment, sometimes with its own smaller door, to visually break up the height and define its purpose as deep storage.
2. The Integrated Appliance Garage: Hiding Clutter in Plain Sight
Countertop clutter is the enemy of a small kitchen. An appliance garage that extends from the counter up to the bottom of the upper cabinets is a classic solution, but we can take it vertical. I often design a slender, full-height pantry cabinet—say 18 inches wide—and dedicate the lower section to be an appliance garage. We install heavy-duty pocket or lift-up doors and interior outlets. The toaster, blender, and coffee maker live inside, ready to use. Above them, the rest of the cabinet provides seamless pantry storage. This isn't just about hiding things; it's about creating a dedicated 'breakfast station' that keeps your primary prep surfaces clear.
3. The Vertical Pull-Out Pantry: The Narrow Space Specialist
I once worked on a galley kitchen in a historic brownstone where we had a baffling 9-inch gap between the refrigerator and the wall. The client saw it as dead space. I saw it as the perfect home for a floor-to-ceiling pull-out pantry. These units are engineering marvels. They slide out on heavy-duty, soft-close hardware, giving you access to shelves from both sides. For a space that seems useless, you can suddenly store dozens of cans, spices, oils, and jars in an incredibly organized fashion. The key is investing in quality hardware; a cheap mechanism will sag and fail under the weight, a mistake I’ve been called in to fix more than once on other builders' work.
4. Stacked Cabinetry: The Two-Tier Approach
Instead of one massive, visually overwhelming tall cabinet door, I often prefer a stacked approach. This involves placing a smaller cabinet directly on top of your main upper cabinet. For example, a 36-inch main upper with an 18-inch cabinet above it reaching a 9.5-foot ceiling. This creates a strong horizontal line that can align with other architectural elements in the room, like window casings. It also gives you design flexibility. You can use solid doors for the lower, everyday cabinets and glass or textured doors for the upper "display" cabinets. This method is also structurally superior for very tall doors, which can be prone to warping over time, especially solid wood panels.
| Material | Warp Resistance | Typical Cost (per sq. ft.) | Best Use Case |
|---|---|---|---|
| Solid Maple | Moderate | $35 - $50 | Traditional kitchens; requires stable humidity. Best for stacked designs. |
| High-Density Fiberboard (HDF) | Excellent | $25 - $40 | Ideal for painted finishes. Extremely stable and won't warp. |
| Rift-Sawn White Oak Veneer | Very Good | $45 - $65 | Modern, linear grain. The veneer over a stable core prevents movement. |
| Thermofoil (RTF) | Good | $20 - $35 | Budget-friendly, but can peel with heat/moisture exposure over time. |
5. The Skinny Utility Cabinet: For Brooms and Step Stools
Every kitchen needs a place for the broom, the Swiffer, and, most importantly in a kitchen with high cabinets, a slim folding step stool. Sacrificing just 6 to 9 inches of width next to a pantry or refrigerator can create a dedicated, full-height utility cabinet. I design these with no shelves, just a few hooks on the inside. It’s a simple solution that has a massive impact on daily organization. Without it, these essential tools end up leaning in a corner or cluttering a coat closet, which is never convenient when you need to clean up a spill.
6. Open Shelving as a Vertical Accent
Not all vertical space needs to be hidden behind a door. To prevent a wall of tall cabinets from feeling like a monolithic block, I like to break it up with a section of open shelving. Imagine a bank of floor-to-ceiling pantry cabinets, and right in the middle, a 24-inch-wide section of thick, floating shelves from the counter to the ceiling. This is where you can display your beautiful pottery, cookbooks, or everyday dishes. It adds personality and airiness, making the entire kitchen feel larger and more inviting. We often use a contrasting material here, like a reclaimed wood shelf against sleek white cabinetry, to make it a true focal point.
7. The Pull-Down Shelf Mechanism
For those high upper cabinets, accessibility is everything. For clients who have trouble reaching or don't want to constantly pull out a step stool, a pull-down shelf mechanism is a game-changer. These are spring-loaded or piston-assisted systems that allow an entire shelf or two to be pulled down and out of the cabinet to counter height. While they take up some interior space and are an added investment (typically $400 - $900 per unit, installed), they transform the highest, least accessible part of your kitchen into prime, ergonomic storage for everyday items like glasses, spices, or medicine.
Your Action Plan for Vertical Storage
- Measure Your Ceiling Height: Get an accurate measurement from the finished floor to the ceiling in at least three places. Ceilings are rarely perfectly level. This is the absolute first step.
- Audit Your 'Deep Storage' Items: Make a list of everything you own that you only use a few times a year (holiday dishes, large pots, specialty appliances). This will determine how much of your new vertical space should be dedicated to long-term storage versus daily access.
- Evaluate Your Reach: Stand on your tiptoes and see how high you can comfortably reach. This will inform whether you need to invest in accessibility solutions like a pull-down mechanism or a dedicated spot for a step stool.
- Consult a Professional: Even with a plan, talk to a certified kitchen designer or a custom cabinet maker. We can spot structural issues, propose solutions you haven't considered, and ensure the final design is both safe and beautiful.
Frequently Asked Questions from My Workshop
- Is it better to have one tall door or stack two separate cabinets for a 9-foot ceiling?
- From a craftsman's perspective, I almost always recommend stacking. A single cabinet door over 48 inches tall, especially if it's solid wood, is highly susceptible to warping as it expands and contracts with seasonal humidity changes. Two smaller doors are exponentially more stable over the long term. It also offers more design flexibility and, in my opinion, looks more architecturally considered and less imposing.
- How much more does it cost to take cabinets to the ceiling versus standard height?
- You should budget for a 20-30% increase in your total cabinetry cost, not just the upper cabinets. It's more than just extra material. It requires more complex installation, often two-piece crown molding to scribe perfectly to an uneven ceiling, and potentially more robust hardware. For an average custom kitchen where cabinets cost $25,000, this could mean an additional $5,000 to $7,500. However, the gain in storage and property value almost always justifies the investment.
- Can I add smaller cabinets on top of my existing standard cabinets?
- Technically, yes, but I rarely advise it. The challenge is threefold: matching the exact door style and finish (wood and stains age and change color over time), aligning the new boxes perfectly with the old ones, and creating a seamless look with the crown molding. It often ends up looking like an afterthought and can cost nearly as much in labor as doing it right from the start. If your budget is tight, it's a better investment to reface the existing cabinets and have the new upper boxes built and finished at the same time for a cohesive, professional result.