

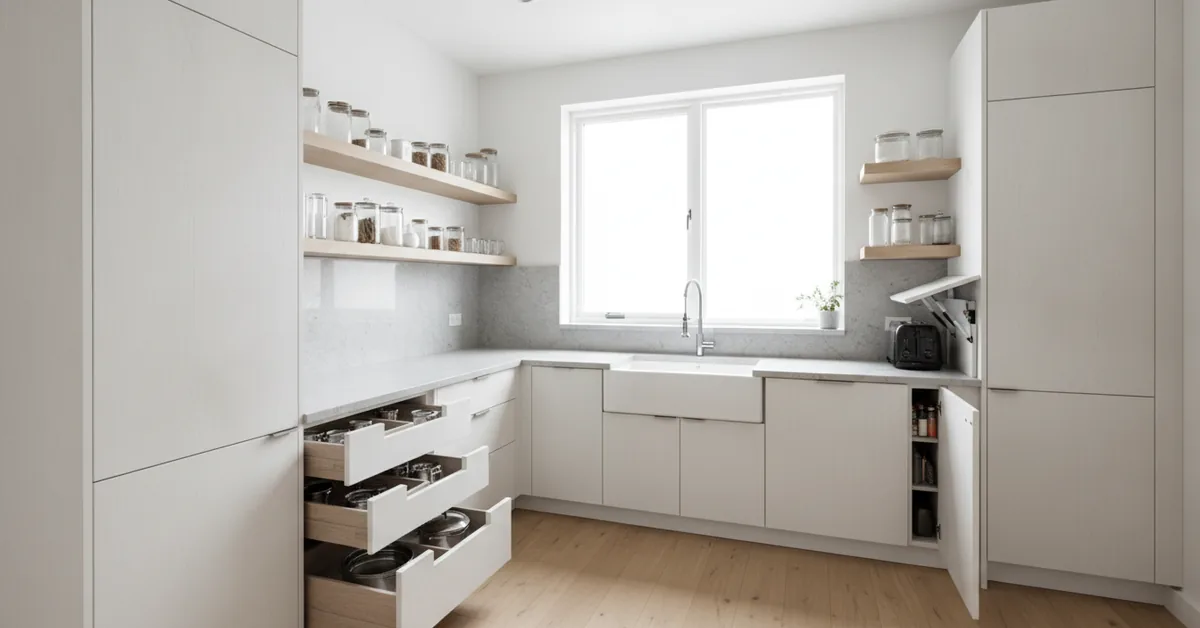
I can tell when a kitchen isn't working the moment I walk in. It's not about the size; it's about the 'kitchen shuffle.' That's the little dance homeowners do, moving the toaster to get to the knife block, which is blocking the spice rack. They've been told to 'go vertical' or 'use organizers,' but they're often applying generic solutions to a space that demands a bespoke strategy. In a compact kitchen, every single cubic inch has a job to do, and if it's not designed with intention, it creates daily friction. The real goal isn't just to store more things; it's to create a workflow that feels effortless, even in the tightest of quarters.
My Four Pillars of Small-Space Storage Philosophy
Think in Cubic Inches, Not Square Feet: The most valuable real estate is often hidden. We'll focus on the full depth
- Think in Cubic Inches, Not Square Feet: The most valuable real estate is often hidden. We'll focus on the full depth and height of your cabinetry, not just the accessible frontage.
- Master the Corners and Awkward Spaces: Corners are notorious dead zones. With the right hardware and custom planning, they can become your most valuable storage assets.
- Customize the Internals, Not Just the Doors: A beautiful cabinet that's a black hole inside is a failure. The magic happens with tailored pull-outs, dividers, and multi-level organizers that bring items to you.
- Choose Materials for Both Function and Feel: In a small space, materials do double duty. They need to be durable, but also light-reflective and visually unobtrusive to make the room feel larger.
The Cooking Zone: Below the Cooktop and Around the Range
This is the engine room of your kitchen, and it needs to be ruthlessly efficient. I once worked with a client in a historic row house where the cooking area was barely 36 inches wide. They had their pots and pans stacked in a deep, dark base cabinet, and cooking was a daily struggle of clanging and searching. My solution wasn't more cabinets; it was smarter cabinets.
We replaced the standard cabinet below the cooktop with two deep, full-extension drawers. This is a game-changer. Instead of kneeling and digging, you pull the drawer out and have a top-down view of every pot and lid. For the narrow 12-inch cabinet next to the stove, we didn't just put in shelves. We installed a two-tiered pull-out, perfect for oils, vinegars, and cooking sprays. The key insight is converting hard-to-reach shelf space into accessible drawer space. This single change can fundamentally alter your cooking workflow.
The Sink and Prep Zone: Conquering the Most Awkward Cabinet
The cabinet under the sink is the most challenging piece of real estate in any kitchen. It's a maze of plumbing, garbage disposals, and water lines. Most people just throw some cleaning supplies in there and call it a day, wasting a massive amount of volume. This is where truly custom work shines. We can build a U-shaped pull-out drawer that fits perfectly around the plumbing, giving you an organized, sliding tray for sponges, soaps, and supplies.
For the adjacent prep area, think about multi-level drawers. Instead of one deep 'junk drawer,' I design a standard-height drawer with a shallow, sliding tray-within-a-drawer on top. The top tray holds your most-used prep tools—peelers, paring knives, measuring spoons. The main drawer below holds larger utensils, whisks, and rolling pins. This doubles your organized surface area within the same drawer front.
The Pantry and Tall Storage: Going Vertical with Intelligence
Everyone wants a walk-in pantry, but in a compact kitchen, a well-designed 18-inch or 24-inch-wide pantry cabinet is far more effective. The mistake I see is a tall cabinet with five or six static shelves. The items in the back are lost forever. The solution is a full-height pantry with roll-out trays. When you open the doors and pull out a tray, you're bringing the entire contents of that shelf out into the room. Nothing gets lost.
Let's compare the two primary options for pantry internals. This is a conversation I have with nearly every client with a small kitchen.
| Feature | Roll-Out Trays (My Preferred Method) | Swing-Out Pantry System |
|---|---|---|
| Accessibility | Excellent. Each shelf pulls out individually for a full view. | Very Good. The entire unit moves, but items on door shelves can block interior views. |
| Weight Capacity | High. Typically 75-100 lbs per tray, ideal for cans and heavy items. | Moderate. Weight must be distributed carefully; door shelves have lower limits. |
| Cost | Moderate. A good balance of cost and high-end functionality. | High. These complex mechanisms are a significant investment. |
| Flexibility | Adjustable tray heights allow you to customize for cereal boxes or small cans. | Less flexible. Shelf placement is often fixed by the mechanism's design. |
For most applications, I find that individual roll-out trays offer superior flexibility and durability for the cost. They allow the homeowner to adapt the pantry as their needs change over time.
The Upper Cabinets: Depth, Height, and Visibility
In a small kitchen, I always advocate for taking upper cabinets all the way to the ceiling. That soffit or empty space above standard 30-inch or 36-inch uppers is a dust-collecting waste. That top foot of space is perfect for seasonal items or appliances you don't use daily, like a stand mixer bowl or a holiday platter.
Another critical detail is cabinet depth. While a standard upper cabinet is 12 inches deep, I often design the cabinet over the refrigerator to be 24 inches deep, flush with the fridge case. This creates a massive, deep storage space for large, light items like paper towels or serving trays. Adding vertical dividers in this cabinet turns it into a highly efficient tray and cutting board organizer.
Your Action Plan: Three Steps to Take This Week
- Conduct a Cabinet Audit: Empty one base cabinet and one upper cabinet completely. Identify everything you haven't used in a year. Then, pay close attention to the wasted space—the empty air above your stacked plates or the dark, unreachable back corners. This physical audit makes the problem tangible.
- Measure Your 'Pain Points': Don't just say 'the corner is bad.' Measure it. Is it a 36x36 inch corner? Is the door opening only 12 inches wide? Take these precise measurements. Look up hardware solutions like 'blind corner pull-outs' or 'magic corners' for your exact dimensions to see what's possible.
- Research One Specific Upgrade: Instead of getting overwhelmed, focus on solving one problem. If your spice storage is a mess, research 15-inch-wide pull-out spice racks or tiered drawer inserts. If your pots are a nightmare, research heavy-duty drawer kits. Focusing on a single, high-impact solution makes the project feel achievable.
Frequently Asked Questions from My Clients
- Are open shelves a good idea in a small kitchen?
- I approach this question with caution. Aesthetically, they can make a space feel more open. Functionally, they are often a disaster in a compact, high-use kitchen. They require constant curating to avoid looking cluttered, and everything on them is exposed to cooking grease and dust. I recommend them only for a very small, dedicated section for display items, not for everyday dishes or food storage. A better alternative is cabinetry with glass door inserts, which gives a lighter feel without the practical downsides.
- What's the single most impactful hardware upgrade for a small kitchen?
- Without a doubt, it's upgrading standard base cabinets to full-extension, soft-close drawers. It's a more involved and costly change than adding a few organizers, but it fundamentally transforms how you interact with 50% of your kitchen storage. By converting static shelves into dynamic drawers, you eliminate kneeling and digging. Every item, from the front to the very back, becomes instantly accessible. This single upgrade delivers the highest return in daily function and ergonomic comfort.
- How much should I budget for custom internal organizers versus just buying new cabinets?
- This is a great question of value. High-quality, German-made hardware for a single blind corner cabinet can cost between $800 and $1,500, just for the mechanism. A full pantry pull-out system can be similar. Retrofitting an entire small kitchen with these solutions could run $4,000 - $7,000 in hardware and skilled labor. In contrast, new mid-grade cabinets for a small kitchen might start around $10,000. If your cabinet boxes are in good shape, investing in custom internals can provide 80% of the functional benefit of a full remodel for less than 50% of the cost. It's a strategic investment in efficiency.