

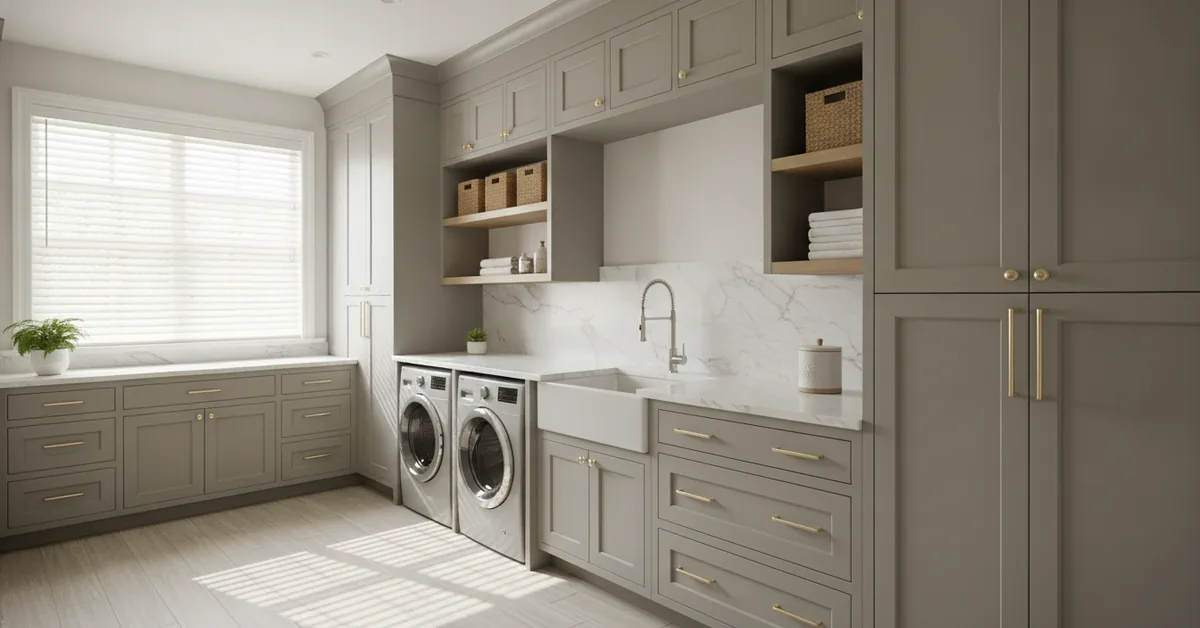
I can tell you the exact moment a client’s dream home renovation hits a wall. It’s not in the kitchen or the master bath. It’s when we walk into the laundry room, and I see the same set of high-end kitchen plans copied and pasted into a space with entirely different demands. A client once showed me a beautiful plan with open shelving in solid walnut for their laundry room, identical to their butler's pantry. I had to be the one to explain that the constant humidity from the dryer would likely cause that gorgeous, expensive walnut to warp within two years. The laundry room isn't a smaller, less important kitchen; it's a unique utility space with its own set of rules, and treating it as an afterthought is the fastest way to functional failure and wasted investment.
My Blueprint for a Truly Functional Laundry Room
Prioritize Material Science Over Aesthetics: The single biggest mistake I see is choosing materials based on kitchen
- Prioritize Material Science Over Aesthetics: The single biggest mistake I see is choosing materials based on kitchen trends. A laundry room's fluctuating humidity and heat demand moisture-resistant materials like high-grade MDF, polymer, or specific plywood cores, not necessarily solid wood.
- Design for Workflow, Not Just Storage: A successful design maps the journey of the clothes: from a dedicated sorting area (dirty), to the machines, to a clean folding surface, and finally to integrated hanging or temporary storage. Cabinetry must support this flow.
- Embrace Full-Height, Purpose-Built Cabinetry: Standard 36-inch base cabinets and 30-inch uppers are a kitchen formula. In the laundry room, I advocate for floor-to-ceiling cabinets that conceal plumbing, stack units, and provide deep, specialized storage for bulk items and cleaning tools.
- Integrate Hidden Helpers: The best laundry rooms I've built feature hidden, integrated solutions. Think pull-out drying racks, tilt-out hampers, and built-in ironing boards that disappear when not in use, maximizing every square inch of usable space.
The Great Material Debate: Why Your Kitchen's Wood Might Fail Here
Everyone loves the look of natural wood, but a laundry room is a hostile environment for it. The cycle of warm, moist air from a dryer followed by cool, dry air can cause solid wood panels, especially wider ones used for cabinet doors, to expand and contract. Over time, this leads to cracked joints and warped doors. After years of service calls, I’ve learned to guide my clients toward more stable, engineered solutions that deliver longevity without sacrificing a high-end look.
The key is to use the right material for the job. For the cabinet boxes (the carcass), I almost always specify a 3/4-inch furniture-grade plywood with a moisture-resistant veneer. For the doors and drawer fronts, where aesthetics are paramount, we have better options than solid wood. A high-density fiberboard (HDF) or MDF core is dimensionally stable—it won't warp—and provides a perfect, flawless substrate for a factory-applied paint finish or a durable thermofoil or laminate wrap. This approach gives you the custom look you want with the durability the space demands.
Mapping the Laundry Workflow: From Dirty Pile to Folded Stack
The most common design flaw I encounter is a complete lack of dedicated counter space. Clients often place their machines side-by-side but fail to install a countertop over them, creating a lint-covered surface that's useless for folding. A well-designed custom laundry room is built around a logical, three-zone workflow.
- The Sorting Zone: This should be your first stop. I often design large, deep drawers or, even better, tilt-out cabinets with removable hamper baskets. This keeps dirty laundry off the floor and pre-sorted. For a recent project in a home with three active kids, we built three separate tilt-out hampers labeled 'Whites,' 'Colors,' and 'Darks' right into the base cabinetry.
- The Washing Zone: This is straightforward, but the cabinetry around it is crucial. I always build a full-depth countertop over side-by-side machines. This immediately gives you a massive, 60-inch wide by 30-inch deep folding and staging area. Above this, we can place upper cabinets for detergents and supplies, ensuring they are out of reach of children.
- The Drying & Finishing Zone: This is where custom solutions truly shine. Instead of a clumsy, freestanding drying rack, I integrate pull-out solutions within a tall cabinet. These can be simple dowel rods or more complex valet systems that slide out when needed. A dedicated tall, narrow cabinet for the ironing board and iron is also a non-negotiable for a clutter-free space.
Hiding the Ugly: Smart Cabinetry for Vents and Hookups
Let's be honest: washer hookups, plumbing shutoffs, and bulky dryer vents are unsightly. Off-the-shelf cabinets do nothing to hide them, leaving an awkward, dust-collecting gap behind the machines. This is where custom work provides immense value. I design the base cabinet system or the surrounding tall cabinets to be deeper than the standard 24 inches. This extra depth allows the machines to sit flush with the cabinet fronts, while all the plumbing and venting is hidden behind a removable back panel inside the cabinet. It creates a seamless, built-in look and makes accessing the utilities as simple as unscrewing a panel, rather than pulling out a 200-pound machine.
| Feature | Standard / Off-the-Shelf Solution | My Custom-Built Approach |
|---|---|---|
| Depth & Integration | Standard 24" depth, leaving gaps behind machines for plumbing. | Custom 28"-32" depth to conceal all hookups behind a finished panel for a flush, built-in look. |
| Material Durability | Often particle board with a thin melamine or paper wrap, susceptible to moisture damage. | Plywood box construction with HDF/MDF doors and a catalyzed conversion varnish finish for maximum moisture resistance. |
| Counter Space | None provided. Tops of machines become cluttered. | A continuous stone or butcher block countertop is installed over the machines, creating a 5-foot+ folding surface. |
| Specialized Storage | Generic open shelves or basic cabinets. | Integrated tilt-out hampers, pull-out drying racks, and dedicated cabinets for ironing boards and cleaning supplies. |
Your Action Plan for a Clutter-Free Laundry Room
Before you talk to a designer or cabinet maker, take 30 minutes to do this. It will save you hours of frustration and thousands of dollars in redesigns. Don't just think about what you need to store; think about how you actually use the space.
- Conduct a Workflow Audit: Physically walk through the process of doing a load of laundry in your current space. Where do you put the basket? Where do you sort? Where do you fold? Write down every single pain point, no matter how small. (e.g., "I have to fold on top of the dryer and socks always fall behind it.")
- Take a Full Inventory: Empty your current laundry cabinets and shelves. Group everything into categories: detergents, stain removers, cleaning supplies, ironing tools, pet supplies, etc. Measure the bulkiest items, like the giant Costco-sized detergent bottle or the vacuum cleaner you want to hide. Give these measurements to your cabinet maker.
- Measure Your Reach: If you're planning upper cabinets, stand in front of the wall and see how high you can comfortably reach. This is critical. There's no point in having three shelves if you can only safely access the bottom one. This helps us design storage that is genuinely accessible for daily-use items.
Frequently Asked Questions from My Clients
- Is it worth the cost to build cabinets around a stacked washer/dryer unit?
- Absolutely. While you lose the long folding counter, building a full-height pantry-style cabinet around a stacked unit is a game-changer for storage efficiency in smaller spaces. I typically design one side of the cabinet to be a tall, open space for brooms, mops, and an ironing board. The other side can be fitted with deep, adjustable shelves for bulk supplies like paper towels and cleaning products, effectively creating a secondary utility closet.
- What is the best countertop material for over a washer and dryer?
- While quartz and granite are excellent, they can be overkill and expensive for a laundry room. My preferred material is often a high-quality laminate or a sealed butcher block. Modern laminates are incredibly durable, waterproof, and cost-effective. A sealed butcher block adds warmth, but it requires diligent sealing to prevent water damage. The key consideration is vibration—the top must be properly installed and secured to the cabinetry and wall cleats to minimize rattling during the spin cycle.
- Can you add a sink to a laundry room with custom cabinets?
- Yes, and I highly recommend it. A utility sink is invaluable. When integrating one, I always specify an undermount sink with a durable countertop like quartz or solid surface. The base cabinet for the sink must be built from plywood—never MDF or particle board—as it's the area most likely to encounter a slow leak over time. I also ensure the cabinet interior is finished with a waterproof coating as an extra layer of protection.