

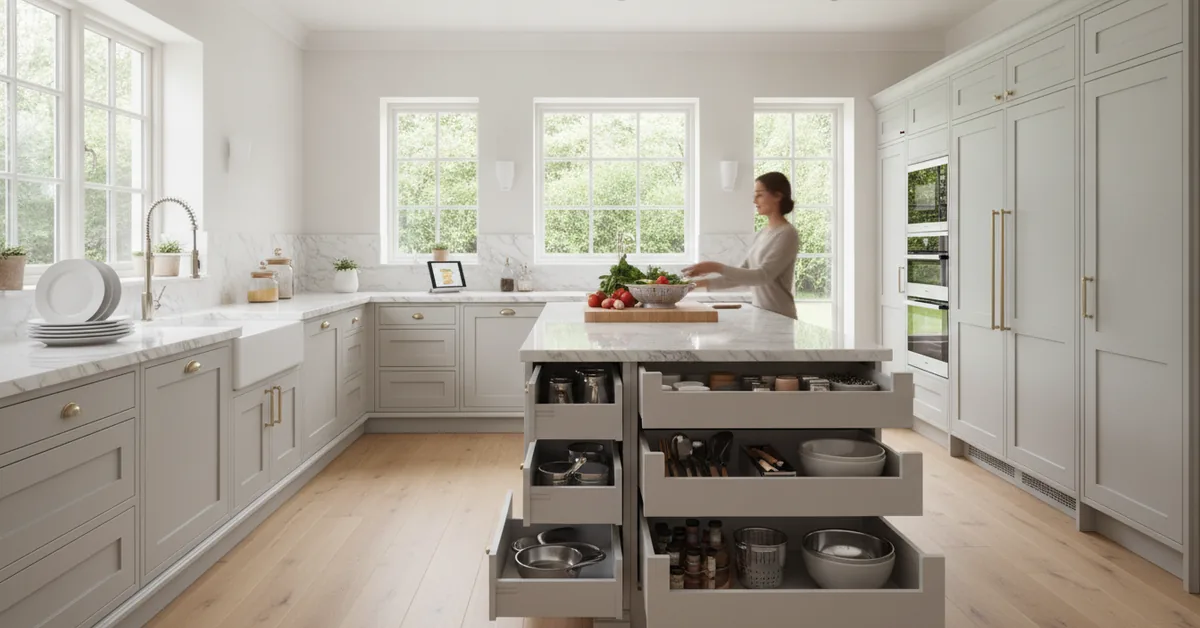
I've walked into countless stunning, newly renovated kitchens that are an absolute nightmare to cook in. The client will show me a beautiful quartz island and perfectly book-matched walnut doors, but then confess they have to walk 15 feet from the sink to the trash can, or that their spice drawer is nowhere near the stove. The most common mistake I see is designing for a photograph instead of for the reality of daily life. A truly high-end kitchen isn't just about how it looks; it's about how it moves, how it supports your every action. Functionality, born from a well-planned workflow, is the invisible architecture of a great kitchen, and custom cabinetry is the key to unlocking it.
From Blueprint to Reality: The Pillars of a Functional Kitchen Workflow
Abandon the Rigid Work Triangle: Modern kitchens are multifunctional. We need to think in terms of "Work Zones"—Prep,
- Abandon the Rigid Work Triangle: Modern kitchens are multifunctional. We need to think in terms of "Work Zones"—Prep, Cooking, Cleaning, and Storage—which are far more practical for today's open-concept living.
- Map Your Movement First, Design Cabinets Second: Before we even discuss door styles, I map out how a client actually uses their kitchen. We trace the path from refrigerator to sink to prep counter. The cabinet design must serve this path, not obstruct it.
- Design Storage for Items, Not Just for Space: A cabinet is just a box until it's designed with purpose. We must plan specific storage for specific items at their point of use, eliminating wasted steps and countertop clutter.
- Prioritize Landing Zones: Every key appliance—refrigerator, oven, microwave, sink—needs dedicated counter space next to it. Forgetting these "landing zones" is a rookie mistake that makes a kitchen incredibly frustrating to use.
The Modern Kitchen: Moving Beyond the Classic "Work Triangle"
The old kitchen design rule was the sacred "work triangle" connecting the sink, refrigerator, and stove. While it's a decent starting point, it's outdated for how we live now. Kitchens are no longer one-person-and-one-task rooms. I design based on a "Work Zone" philosophy, which is far more fluid and practical. We create dedicated areas for specific activities, each with its own set of tools and storage. For example, a baking zone might have a lower marble countertop for rolling dough, with deep drawers below for flour, sugar, and mixing bowls, and a cabinet above for spices and measuring cups. This zonal approach is where custom cabinetry truly shines because we can tailor every inch to a specific task.
Mapping Your Daily Kitchen Dance: The Workflow Audit
I once had a client, a wonderful woman who loved to host large family dinners. Her architect had designed a massive, beautiful island, but placed the main sink on the perimeter wall and the trash pull-out on the far end of the island. During our workflow audit, we realized she would chop vegetables at the island, then carry dripping hands and scraps across the main walkway to the sink and trash. It was a recipe for a constant mess and a logistical bottleneck. We redesigned the island to include a small prep sink and a dual-bin trash/recycling pull-out right in her prep zone. It was a simple change on paper, but it completely transformed how she could work in her space. This is why I insist on a workflow audit. Before a single piece of plywood is cut, we must understand the user's "kitchen dance."
Cabinetry Solutions for Each Work Zone
Generic, off-the-shelf cabinets force you to adapt to them. Custom cabinetry adapts to you. The goal is to place every tool and ingredient within arm's reach of where you'll use it. Here’s a breakdown of how I typically organize storage within each zone to maximize efficiency.
| Work Zone | Primary Function | Essential Custom Cabinetry Solutions | Ideal Location |
|---|---|---|---|
| Prep Zone | Washing, chopping, mixing | Integrated trash/compost pull-out, knife block drawer insert, deep drawers for mixing bowls, dedicated cutting board slot. | Between the sink and the cooking zone, often on an island. Needs at least 36 inches of clear counter space. |
| Cooking Zone | Stovetop and oven use | Pull-out spice rack next to the cooktop, deep drawers for pots and pans directly below, vertical tray dividers for baking sheets. | Centered around the range or cooktop. Landing space on both sides is critical. |
| Cleaning Zone | Washing dishes, managing waste | Tilt-out tray under the sink for sponges, roll-out caddy for cleaning supplies, dedicated dishwasher panel. | Surrounding the main sink and dishwasher. Should be close to daily dish and glassware storage for easy unloading. |
| Storage Zone | Pantry items and refrigeration | Full-height pantry with pull-out shelves, appliance garage for small electronics, integrated refrigerator panels. | Often on the perimeter to avoid breaking up counter space. Should be easily accessible from the kitchen entry. |
Why Interior Fittings are More Important Than Door Styles
Clients often get fixated on the look—the Shaker door, the perfect shade of gray paint, the brass hardware. While aesthetics are vital, I always steer the initial conversation to the inside of the cabinets. A kitchen's functionality is defined by its interior fittings. Think about a standard 36-inch base cabinet with two doors and a fixed shelf inside. It's an awkward, dark cavern where you have to get on your knees to find a pot in the back. Now, imagine that same 36-inch space as two deep, full-extension drawers. Suddenly, every single item is visible and accessible from above. This single change from doors to drawers in base cabinets is the most impactful functional upgrade you can make. High-quality drawer glides (I prefer brands like Blum or Grass) rated for at least 90 lbs are a non-negotiable investment for longevity and a quality feel.
Your Action Plan: How to Start Planning Your Workflow Today
You don't need a designer standing over your shoulder to begin this process. A little bit of observation and planning now will pay massive dividends later. Here is the exact process I walk my clients through.
- Track Your Steps: For one week, pay close attention to how you move in your current kitchen. Where do you find yourself walking back and forth unnecessarily? What frustrates you? Make a list of these "pain points." Do you always have to walk across the room for a spatula? Write it down.
- Inventory Your Items: Empty your cabinets and drawers. Group everything by task: baking supplies, coffee/tea items, pots and pans, everyday dishes. This helps you visualize how much space you truly need for each category and where it should logically live.
- Draw a Simple Zone Map: On a piece of paper, sketch your kitchen layout. Forget cabinets for a moment. Just draw the appliances. Now, label the four key zones (Prep, Cooking, Cleaning, Storage) where they make the most sense. This is your foundational workflow map.
- Assign Storage to Zones: Using your inventory list from step 2, start assigning categories to your zones on the map. "Pots and pans" go in the Cooking Zone. "Mixing bowls" go in the Prep Zone. This exercise will reveal where you need drawers, where you need vertical storage, and where a pantry makes sense.
- Measure Your Landing Zones: Ensure you have a minimum of 15-18 inches of clear counter space next to your refrigerator, oven, and microwave. Your primary prep space should be at least 36 inches wide. If you don't have this, you need to rethink the layout.
Frequently Asked Questions from My Clients
- What's the ideal distance between an island and the perimeter cabinets?
- The industry standard is 42 inches for a one-cook kitchen and 48 inches for a two-cook kitchen, measured from countertop edge to countertop edge. I find that 42 inches can feel tight if you have appliances opening into the walkway. I strongly advocate for 48 inches whenever possible. It feels spacious, allows two people to pass each other easily, and gives you room to fully open dishwasher and oven doors without blocking the entire path. Anything over 60 inches, however, can feel too large and make the island feel disconnected from the perimeter.
- Are corner cabinets always a waste of space? What's the best solution?
- The classic "blind corner" cabinet is notoriously inefficient. However, we have excellent modern solutions. The best, in my opinion, is a set of drawers that meet in the corner, which requires precise custom cabinet making but eliminates the corner entirely. For a more standard approach, a "Lazy Susan" is decent, but the most functional hardware solutions are the pull-out systems like the LeMans or Magic Corner units. They have articulated shelves that swing completely out of the cabinet, bringing all the contents to you. They are a significant upgrade over a fixed shelf but do add between $800 and $1,500 to the cost of that single cabinet.
- How does appliance selection impact the cabinet workflow and design?
- It impacts it profoundly, and it's why I insist on finalized appliance specifications before I design a single cabinet. A 48-inch pro-style range requires a different ventilation hood and cabinet configuration than a 30-inch slide-in. A French door refrigerator needs more side clearance to open fully than a single-door model. A drawer microwave installed in an island has different framing and electrical needs than an over-the-range unit. Choosing your appliances first dictates the precise dimensions, clearances, and functional flow of the cabinetry around them. It is not a detail to be decided later.