

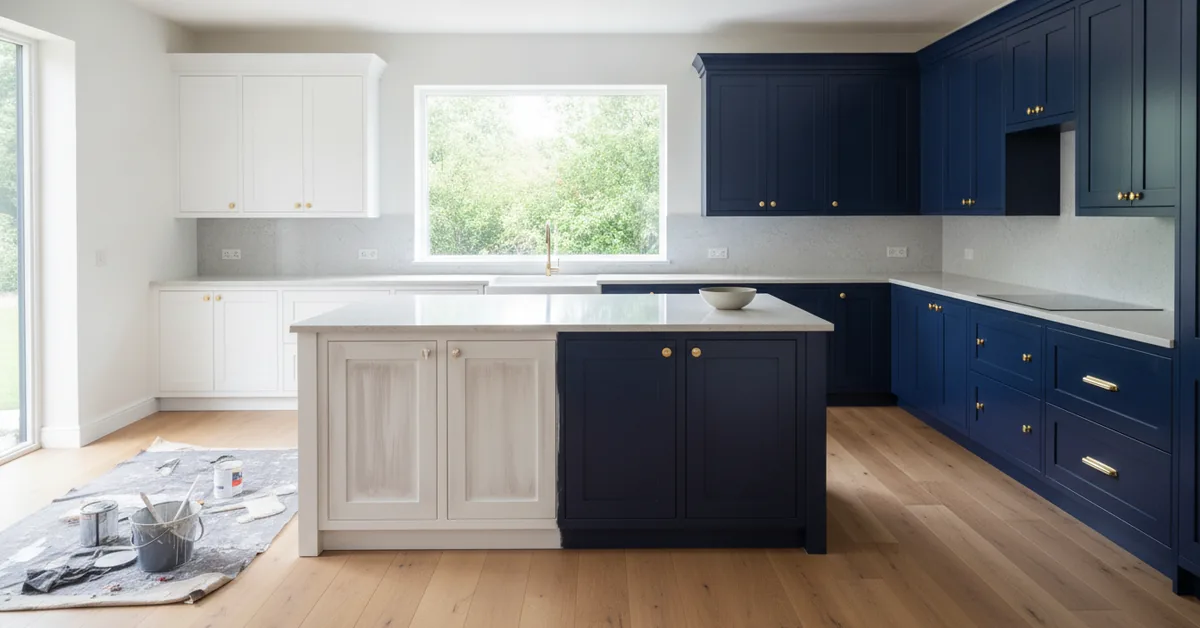
I see it every few months. A client calls me, voice full of a mix of frustration and regret, to fix a DIY cabinet refinishing project gone wrong. They followed a popular online tutorial, bought the 'best' all-in-one paint from a big-box store, and now their kitchen is a landscape of peeling paint, sticky doors, and visible brush strokes that catch the morning light in the worst possible way. The promise of a weekend transformation for a few hundred dollars has turned into a multi-thousand-dollar rescue mission. This isn't about shaming anyone; it's about pulling back the curtain on an industry where the marketing of 'easy' often hides a very complex reality.
The Critical Differences: A Craftsman's Viewpoint
Surface Preparation is 90% of the Job: The final finish is only as good as the surface beneath it. Professionals use
- Surface Preparation is 90% of the Job: The final finish is only as good as the surface beneath it. Professionals use chemical stripping, multi-stage sanding, and grain filling—steps that consumer-grade products and tools simply cannot replicate for a durable, factory-like finish.
- Material Science Matters: A professional's choice of finish—like a 2K (two-component) polyurethane or a conversion varnish—is based on chemical cross-linking that creates a hard, non-porous, and chemically resistant shell. This is fundamentally different from the air-drying acrylic latex paint sold for DIY projects.
- The Environment is Not Your Friend: A professional spray booth provides a dust-free, temperature- and humidity-controlled environment. Your garage or backyard, with its fluctuating temperatures and airborne particles, is the primary cause of imperfections like grit in the finish or improper curing.
- Cost vs. Value: The true cost of a failed DIY job isn't the initial $500 spent on supplies. It's the thousands required for a professional to strip the failed attempt and do it correctly, often costing more than if they had been hired from the start, not to mention the loss of your home's resale value.
The Myth of the "One-Coat Wonder" Paint
One of the biggest misconceptions I encounter is the belief in a magic paint that requires minimal prep. These 'paint and primer in one' products are marketed brilliantly but are a compromise from the start. I once consulted on a project in a historic home where the owner had meticulously applied a popular chalk paint directly over the original lacquered cherry cabinets. Within a year, every time a warm plate was placed against a door, the paint would soften and peel. Why? The original lacquer finish was never properly de-glossed and sealed. The new water-based paint couldn't create a mechanical bond with the solvent-based lacquer, a fundamental chemistry mismatch.
A professional process involves a complete system. We don't just paint; we build a finish. This involves a degreaser, a scuff-sanding stage, a solvent wipe, a dedicated bonding primer designed for the substrate (wood, MDF, thermofoil), and then multiple thin topcoats of a catalyzed product. This isn't just painting; it's industrial wood finishing applied in a residential setting. There is no single product that can properly replace this multi-step chemical and mechanical process.
DIY vs. Professional: A Head-to-Head Materials & Process Breakdown
To truly understand the gap, you need to see the process and materials side-by-side. It’s not about effort; it's about access to different technologies and environments. A dedicated homeowner can put in 80 hours of work, but without the right tools and materials, they are fighting an uphill battle against chemistry and physics.
| Factor | Typical DIY Approach | Professional Restoration Process |
|---|---|---|
| Surface Preparation | Light scuff sand, TSP wash, or liquid deglosser. Often incomplete removal of grease and contaminants. | Full removal of doors/drawers to shop. Chemical stripping or extensive sanding with multiple grits (e.g., 120 -> 180 -> 220). Grain filling on open-grain woods like oak. |
| Priming | All-in-one latex paint/primer or a single coat of a shellac-based primer. | High-solids, post-catalyzed vinyl sealer or a dedicated bonding primer matched to the topcoat's chemistry. Sprayed and sanded smooth. |
| Topcoat Material | Water-based acrylic latex or enamel, often applied with a brush or roller. Air dries by water evaporation. | Solvent-based conversion varnish or a two-component (2K) polyurethane. Cures via a chemical reaction (catalysis), creating a much harder surface. |
| Application & Environment | Brush/roller in a garage or basement. Prone to dust, drips, brush marks, and inconsistent temperature/humidity. | HVLP (High Volume, Low Pressure) spray guns in a downdraft, positive-pressure spray booth. Controlled, clean, and optimal for curing. |
| Durability & Longevity | 1-3 years before noticeable chipping, peeling, or staining, especially around high-contact areas like knobs and sink cabinets. | 10-15+ years. The finish is chemically resistant to household cleaners, oils, and moisture. Meets KCMA (Kitchen Cabinet Manufacturers Association) standards. |
The Unseen Enemy: Wood Movement and Grain Telegraphing
Here’s something the DIY tutorials never mention: wood breathes. With seasonal changes in humidity, solid wood panels in your cabinet doors will expand and contract. A thick, brittle layer of DIY latex paint can't flex with this movement. As the wood shifts, the paint cracks at the joints, a phenomenon we call 'joint fracturing.' I've seen this happen within a single season on DIY-painted maple shaker doors.
Furthermore, on woods with prominent grain like Red Oak, that grain will eventually 'telegraph' through a thin paint job. A DIYer might think they've covered it, but a few months later, the texture of the grain reappears. A professional process includes using high-build primers or dedicated grain fillers. We're not just changing the color; we are changing the surface texture itself to create a perfectly smooth, stable foundation that will look just as good in five years as it does on day one.
Your Action Plan: How to Decide the Right Path
Before you pick up a paintbrush, perform an honest assessment of your goals, budget, and the current state of your cabinets. This isn't about choosing the 'best' option, but the 'right' option for your specific situation.
- Assess Your Cabinets' Condition: Are they solid wood, MDF, or thermofoil? Is the current finish peeling or just worn? If there is structural damage or the surface is a peeling laminate, a simple repaint is not a viable solution.
- Define Your Goal: Are you looking for a short-term refresh for a home you plan to sell in 1-2 years? A carefully executed DIY job might suffice. Are you updating your 'forever home' kitchen? Investing in a professional finish that will last a decade or more is the more prudent financial decision.
- Get a Professional Quote (Even if You Plan to DIY): This is the most important step. A quote from a reputable refinisher isn't a sales pitch; it's a diagnostic report. They will identify issues you haven't seen. The cost might be $5,000-$8,000 for an average kitchen, which provides a realistic benchmark for the value of the labor, materials, and durability you are trying to replicate.
- Calculate the True DIY Cost: Don't just budget for paint and brushes. Factor in a quality sander, sandpaper (multiple grits), wood filler, grain filler, tack cloths, masking supplies, a high-quality primer, and the topcoat. Add the cost of your own time. You'll often find the material cost alone can exceed $700-$1,000 for a quality result, narrowing the gap with a professional job more than you'd think.
Frequently Asked Questions from a Craftsman's Perspective
- Is it ever a good idea to DIY cabinet refinishing?
- Yes, in specific scenarios. If you have a laundry room or secondary bathroom with older, paint-grade cabinets and you understand the limitations, it can be a cost-effective cosmetic update. However, for a primary kitchen that endures daily heavy use, the risk of a premature failure and the resulting 'sticky' or chipped finish often outweighs the initial savings. It's about matching the method to the application's demands.
- My cabinets are thermofoil (the plastic-like coating). Can they be painted?
- This is a common and tricky situation. If the thermofoil is peeling, it must be completely removed—a labor-intensive process that involves heat guns and a lot of scraping. The substrate underneath is typically MDF. Once the thermofoil and all adhesive residue are gone, the MDF can be prepped and painted professionally using a system designed for it. Simply painting over intact (or worse, peeling) thermofoil is a recipe for failure, as the paint has nothing stable to adhere to. It requires a specialized, high-adhesion primer after a thorough scuffing and cleaning.
- A professional quoted me almost the same price for refinishing as for new cabinet doors. Why is that?
- This is a sign of an honest professional. The labor involved in properly stripping, preparing, and finishing existing doors—especially intricate ones with many details—can sometimes approach or even exceed the cost of manufacturing new, raw MDF shaker doors. When we refinish, we are performing painstaking restoration work. When we build new doors, we are working with a perfect, clean slate in a highly efficient production environment. If your doors are a simple style and in good shape, refinishing is usually more cost-effective. If they are complex, damaged, or a deeply-grained oak you want perfectly smooth, ordering new doors for refinishing can sometimes be the better value.